
Enabling code signing with NuGet, Azure Key Vault, and AppVeyor
About 4 weeks ago, I decided to code sign the NuGet packages from my personal open-source projects. I finally succeeded this weekend. When I started, I figured it couldn’t be that hard. In the end, it really isn’t, but it took hours of research to figure out how to tie it all together. In this post, I’ll share the technical details of what it took to enable code signing using Azure Key Vault, AppVeyor, and NuGet for one of my .NET Core projects.
Background
If you find this subject daunting, even with instructions, you are not alone. Years ago in school, Kent Seamons showed my class usability studies he and Daniel Zappala were conducting on S/MIME, GPG, and ‘Secure Email’. The findings, unsurprisingly, showed that most users have trouble using crypto tools, even when provided instructions.
Part of the trouble is understanding the concepts and terms. Let me start by providing rudimentary explanations, in the context of my CommandLineUtils project.
- Code signing means applying a digital signature to the executable binaries (for example
McMaster.Extensions.CommandLineUtils.dll). This signature confirms the authenticity and integrity of the files. - Authenticity proves the files came from me, Nathan McMaster, and not someone pretending to be me.
- Integrity also proves the files have not been altered by anyone since I made them.
- A certificate contains public information about me and a public key. Anyone can see my certificate, but only I can produce a signature with it because I keep secret the private key, which matches with the public key in the certificate. Anyone can create a certificate for free on their own, but Windows apps won’t treat this as “trusted” unless you get a certificate from a CA.
- A certificate authority (CA) is an entity that issues certificates. In my case, I worked with DigiCert to get a certificate. This certificate, unlike a self-created cert, contains additional information which proves DigiCert gave me the certificate.
Code signing does not, however, guarantee that my binaries are safe to use. Tools like antivirus are required to check that.
How to setup code signing
Code-signing requires at least 3 things:
- A code signing certificate
- A Windows machine
- Binaries to sign
I chose to use:
- DigiCert - a Microsoft-approved certificate authority
- AppVeyor - provides Windows VMs for free to compile and test my open-source project. They provide a way to keep passwords secret even though everything else is publicly visible.
- Azure Key Vault - the AppVeyor VMs are deleted after every build I produce, so I needed a place to store the code signing certificate and its private key between builds.
Acquire a code signing certificate
I needed a real code signing certificate from a certificate authority trusted by Microsoft, so I got one through DigiCert. They had pretty good instructions for creating a certificate. In the end, I received my certificate as a .pfx file.
Every vendor is different, but in order to get a certificate from DigiCert, I submitted documents (Verizon phone bill, photocopy of drivers license) and video chatted on Skype with them to prove my identity. This took a few weeks to complete.
While I waited, I made a self-signed certificate to test my setup. In Powershell, I used the
New-SelfSignedCertificate,
Export-Certificate
and Export-PfxCertificate commands to generate a .pfx file.
$testCert = New-SelfSignedCertificate -Subject "CN=TestCodeSignCert, OU=Use for testing only" `
    -FriendlyName TestCodeSignCert `
    -Type CodeSigning `
    -KeyUsage DigitalSignature `
    -KeyLength 2048 `
    -KeyAlgorithm RSA `
    -HashAlgorithm SHA256 `
    -CertStoreLocation Cert:\CurrentUser\My

# This certificate does not contain the private key
# and is for public usage
Export-Certificate -Cert $testCert -FilePath "codesigncert.cer"

# This certificate contains the private key so distribute carefully
$exportPassword = ConvertTo-SecureString -String "mycertpassword" -Force -AsPlainText
Export-PfxCertificate -Cert $testCert `
    -FilePath codesigncert.pfx `
    -Password $exportPassword
Configure NuGet.org
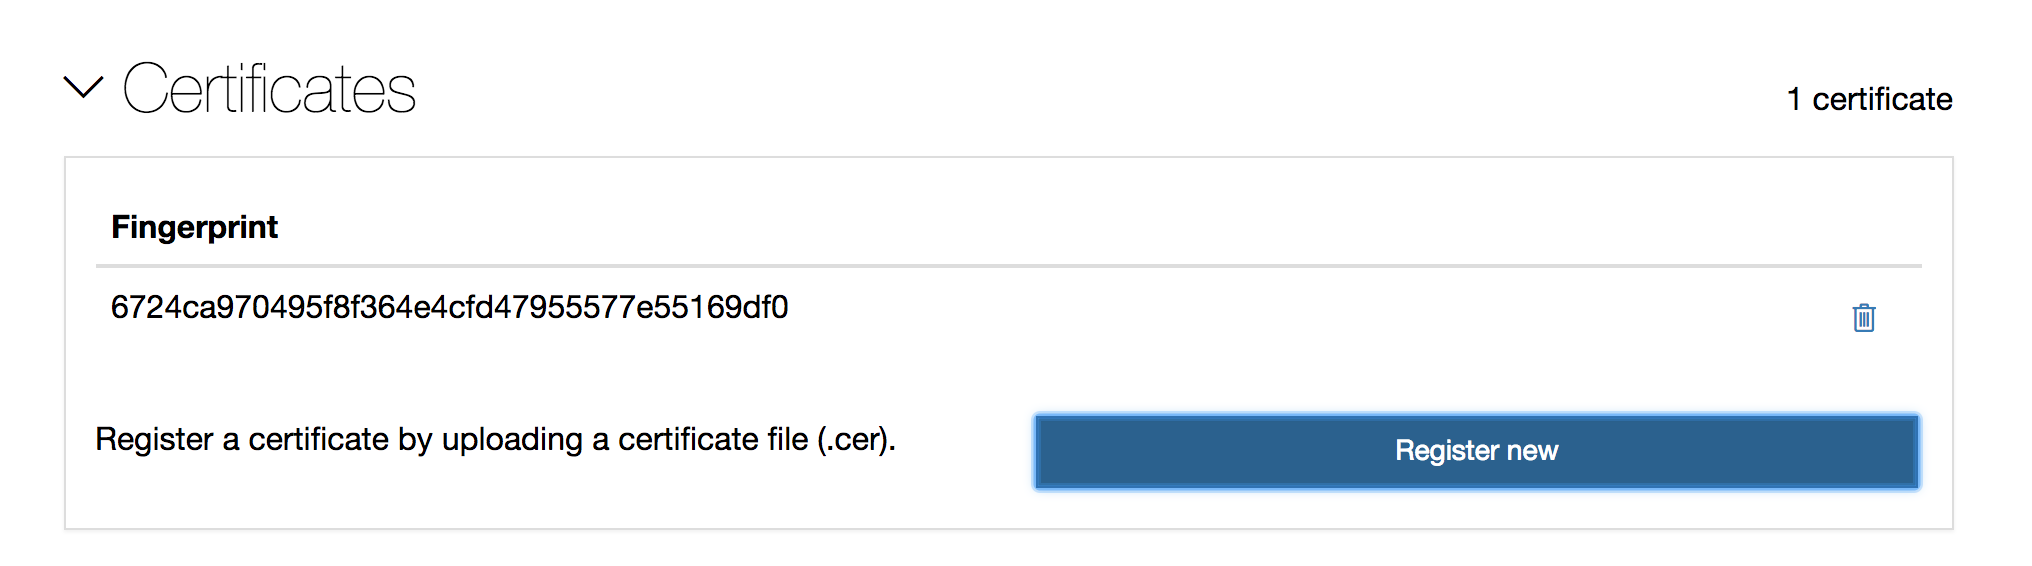
To make my NuGet packages to appear as “trusted”, I registered my new certificate on NuGet.org under Account Settings. I uploaded my *.cer file (which does not contain a private key.)
Configure Azure Key Vault
Azure Key Vault is an inexpensive way to securely store and manage secrets, keys, and certificates. It took a while to setup access to this tool, so I took a bunch of screenshots to explain the steps I took. This part was not obvious, so read carefully.
Create an ‘app’ in Azure AD
The code signing tools (discussed later) can automatically load and use a certificate stored in Key Vault. These tools needed a Client ID and Client Secret, which I created by adding an “application” in Azure Active Directory.
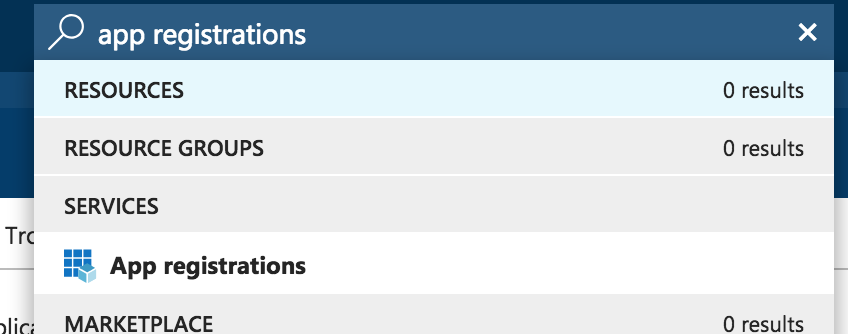
In the Azure Portal, go to “App registrations” blade.
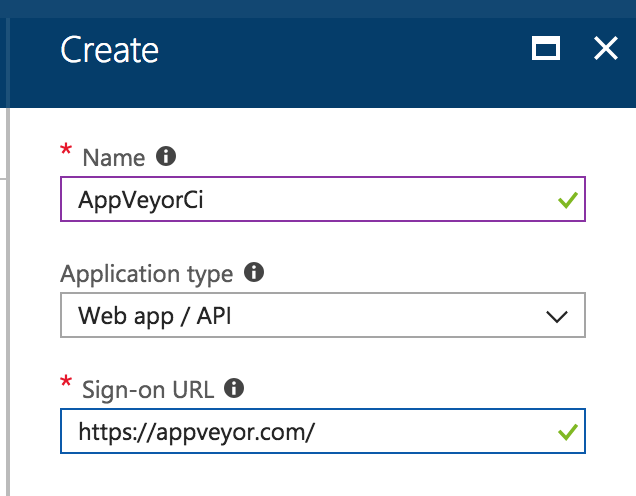
Clicked New application registration. The value of the sign on URL didn’t appear to be important since I’m only using the app to access Key Vault, so I put https://appveyor.com.
Clicked on the new application in the list on App registrations to view its information. The Application ID is the Client ID.
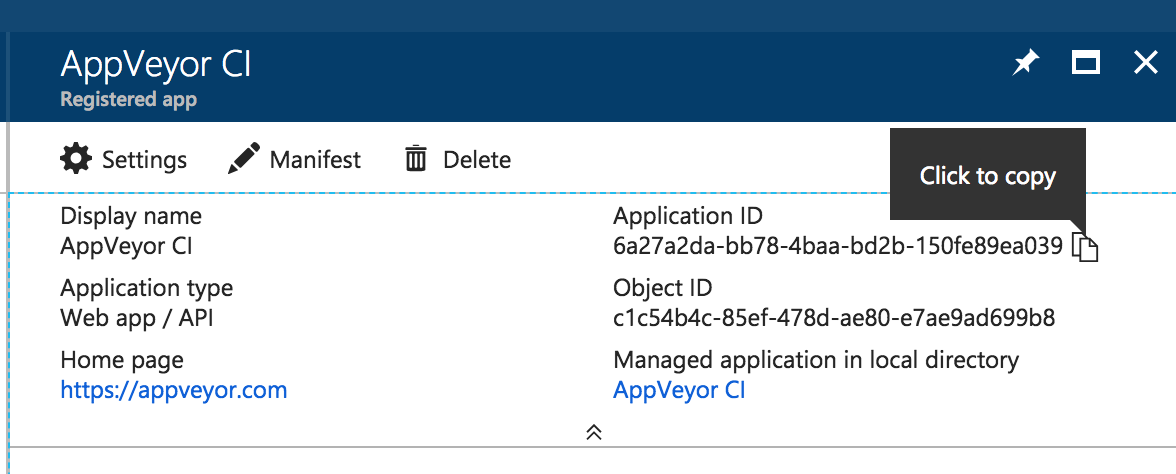
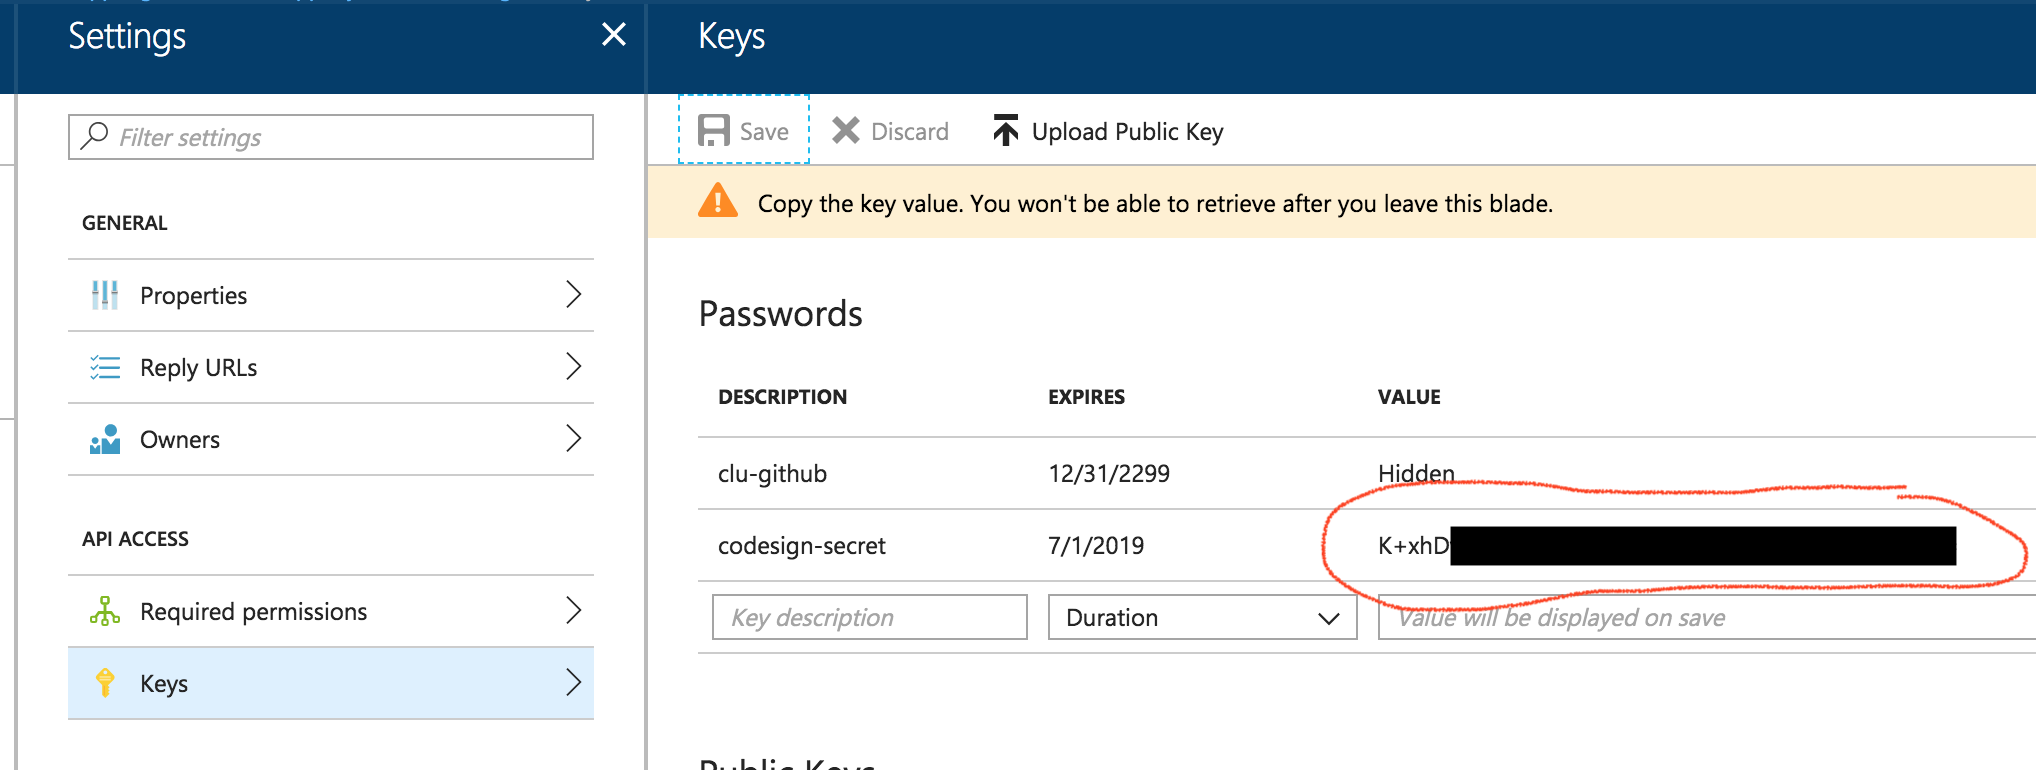
Next, generated a new password for the app by clicking on “Settings” > “Keys” section. Created a new password and clicked Save. The generated value is the Client Secret.
Create a Key Vault
In the Azure Portal, this was as easy “Create a resource” -> Key Vault. This guide explains more about how to get started with Key Vault.
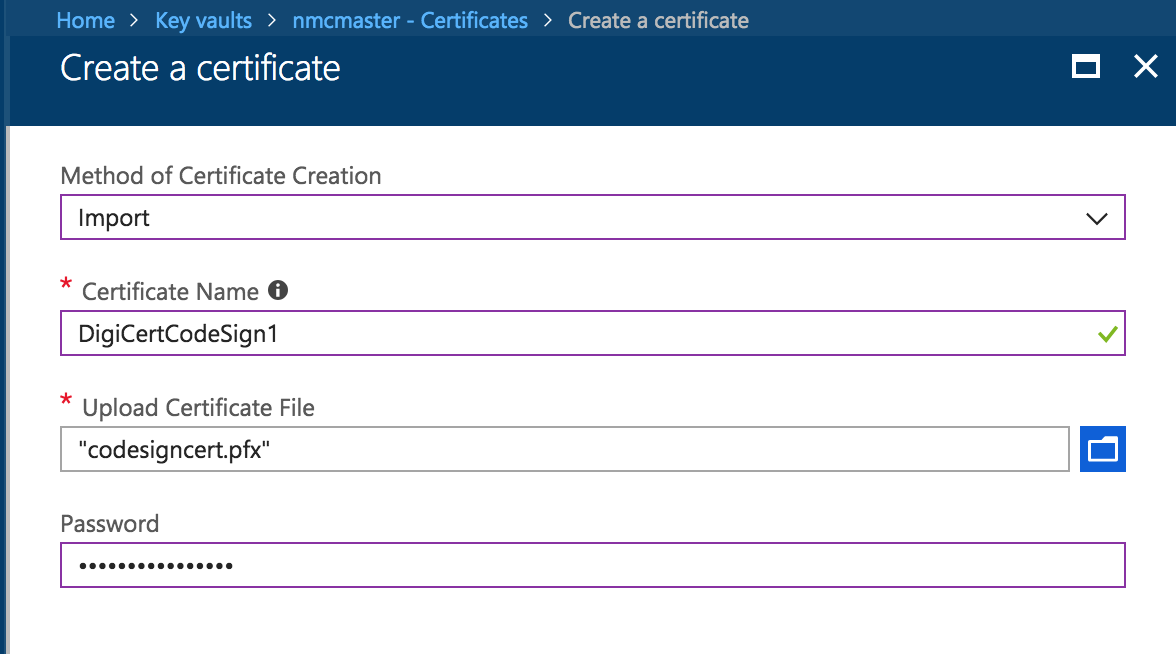
Once ready, I uploaded the .pfx certificate file (with the private key). In the Azure Portal, the upload pages is under “Certificates” > “Generate/Import”.
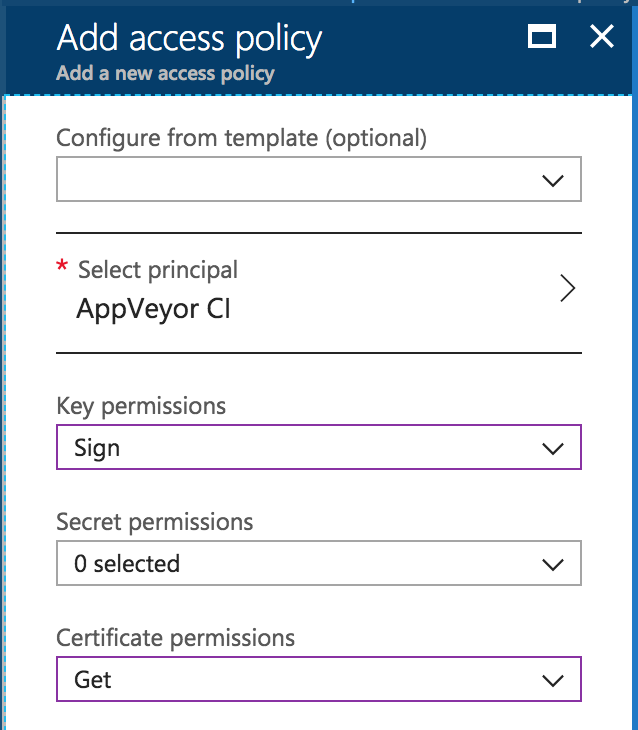
Next, I added permissions to my application from the steps above to interact with the Key Vault. Under “Access policies”, click “Add New”.
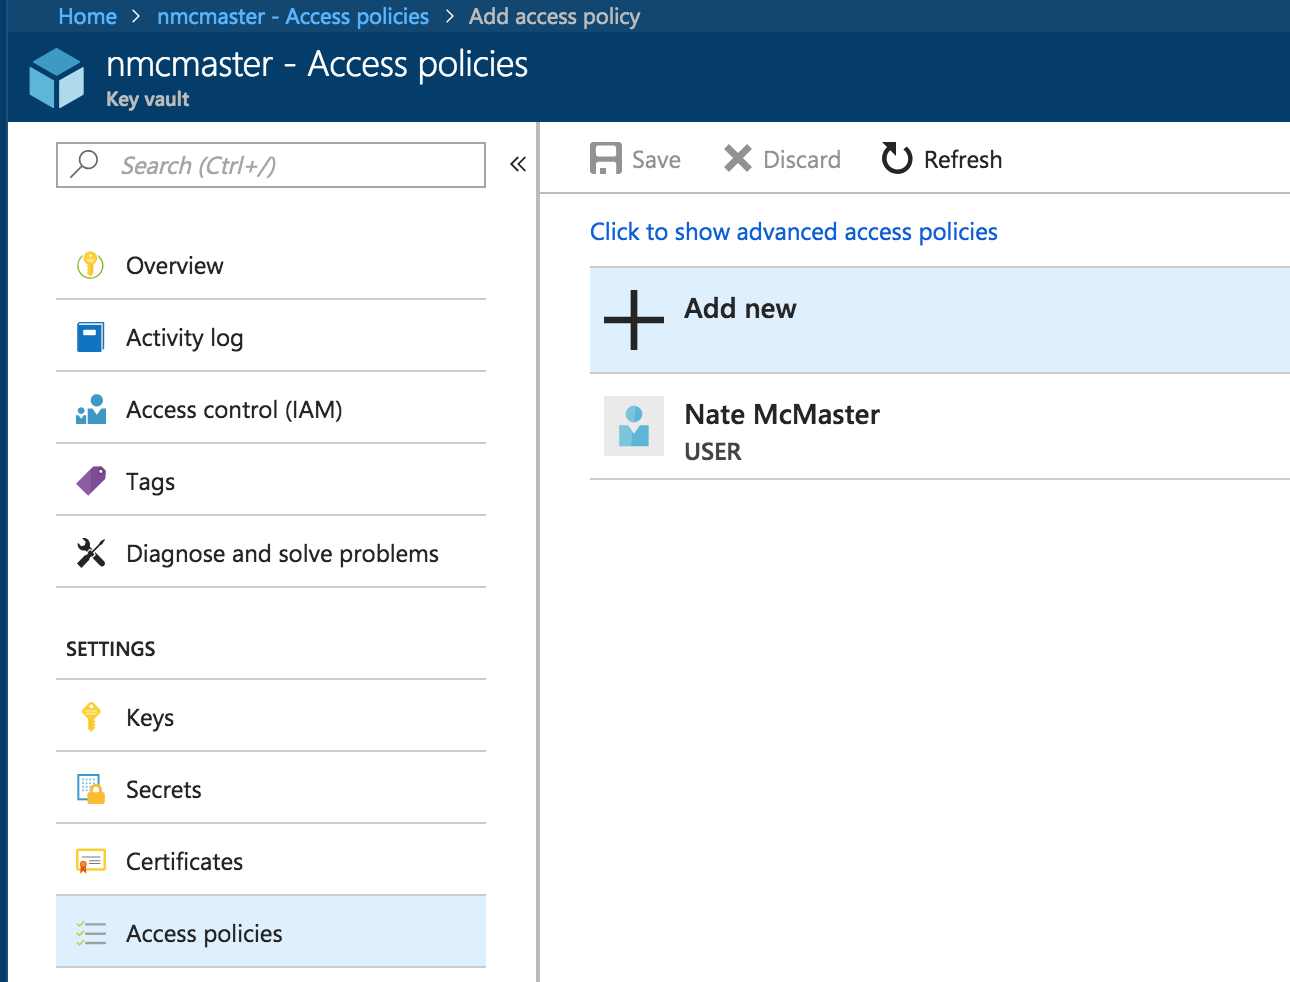
Under “Select a principal”, I found the application and gave the app these permissions:
- Key permissions
- Crytpographic Operations
- Sign
- Crytpographic Operations
- Certificate permissions
- Certificate Management Operations
- Get
- Certificate Management Operations
Code sign binaries with Azure Sign Tool
Azure Sign Tool, by Kevin Jones and Oren Novotny, is a console tool which authenticates to Key Vault to acquire your code signing cert and adds Microsoft Authenticode signatures to your binaries, such as .dll and .exe files. My build currently downloads the tool, but hopefully soon it will be available as a .NET Core global tool. A basic usage of the tool might look like this:
AzureSignTool.exe sign McMaster.Extensions.CommandLineUtils.dll \
  --file-digest sha256 \
  --description-url "https://github.com/natemcmaster/blog" \
  --no-page-hashing \
  --timestamp-rfc3161 http://timestamp.digicert.com \
  --timestamp-digest sha256 \
  --azure-key-vault-url https://nmcmaster.vault.azure.net \
  --azure-key-vault-client-id "6a27a2da-bb78-4baa-bd2b-150fe89ea039" \
  --azure-key-vault-client-secret "K+xhD***********" \
  --azure-key-vault-certificate "DigiCertCodeSign1"
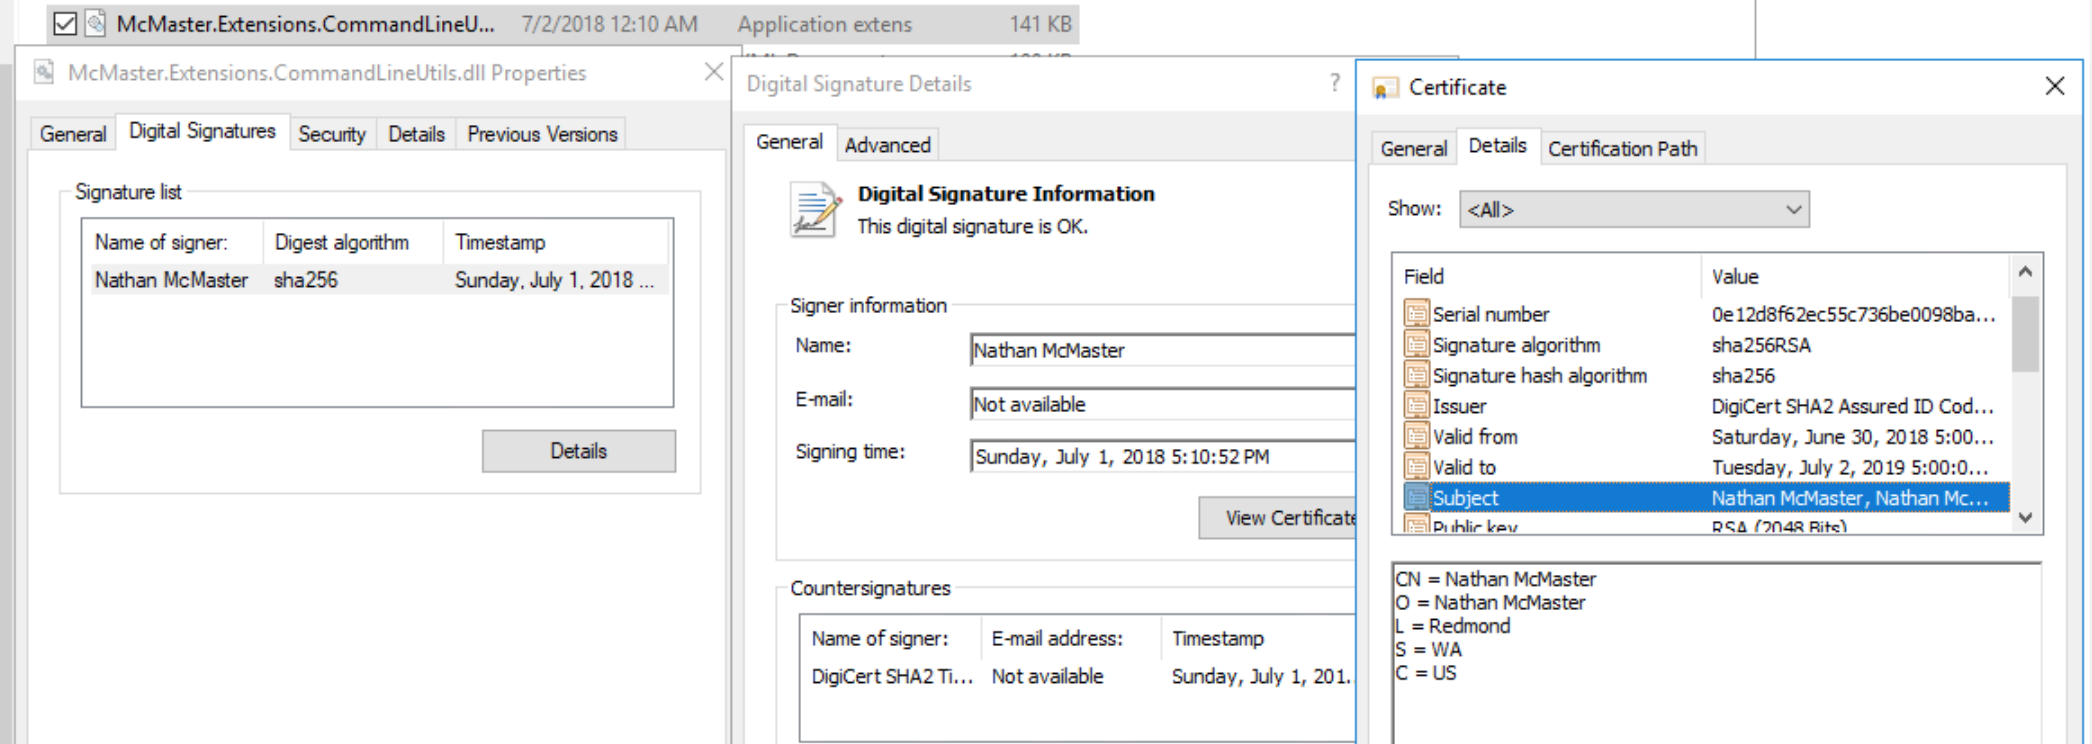
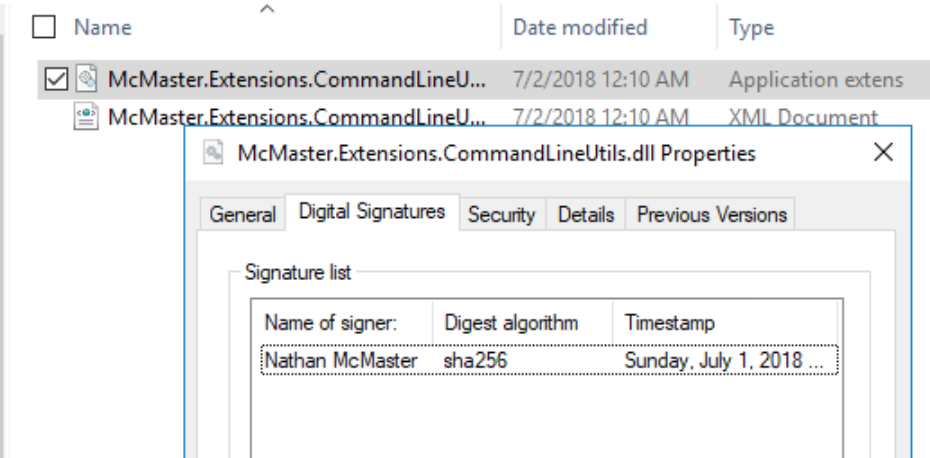
You can inspect the code signatures applied with File Explorer by right clicking on the file and viewing its properties.
Code sign NuGet packages with NuGet Key Vault Sign Tool
NuGet Key Vault Sign Tool, by Oren Novotny, is a console tool which authenticates to Key Vault to acquire your code signing cert and adds signatures to your NuGet package files (*.nupkg). A basic usage of the tool might look like this:
NuGetKeyVaultSignTool.exe sign McMaster.Extensions.CommandLineUtils.2.2.5.nupkg \
  --file-digest sha256 \
  --timestamp-rfc3161 http://timestamp.digicert.com \
  --timestamp-digest sha256 \
  --azure-key-vault-url https://nmcmaster.vault.azure.net \
  --azure-key-vault-client-id "6a27a2da-bb78-4baa-bd2b-150fe89ea039" \
  --azure-key-vault-client-secret "K+xhD***********" \
  --azure-key-vault-certificate "DigiCertCodeSign1"
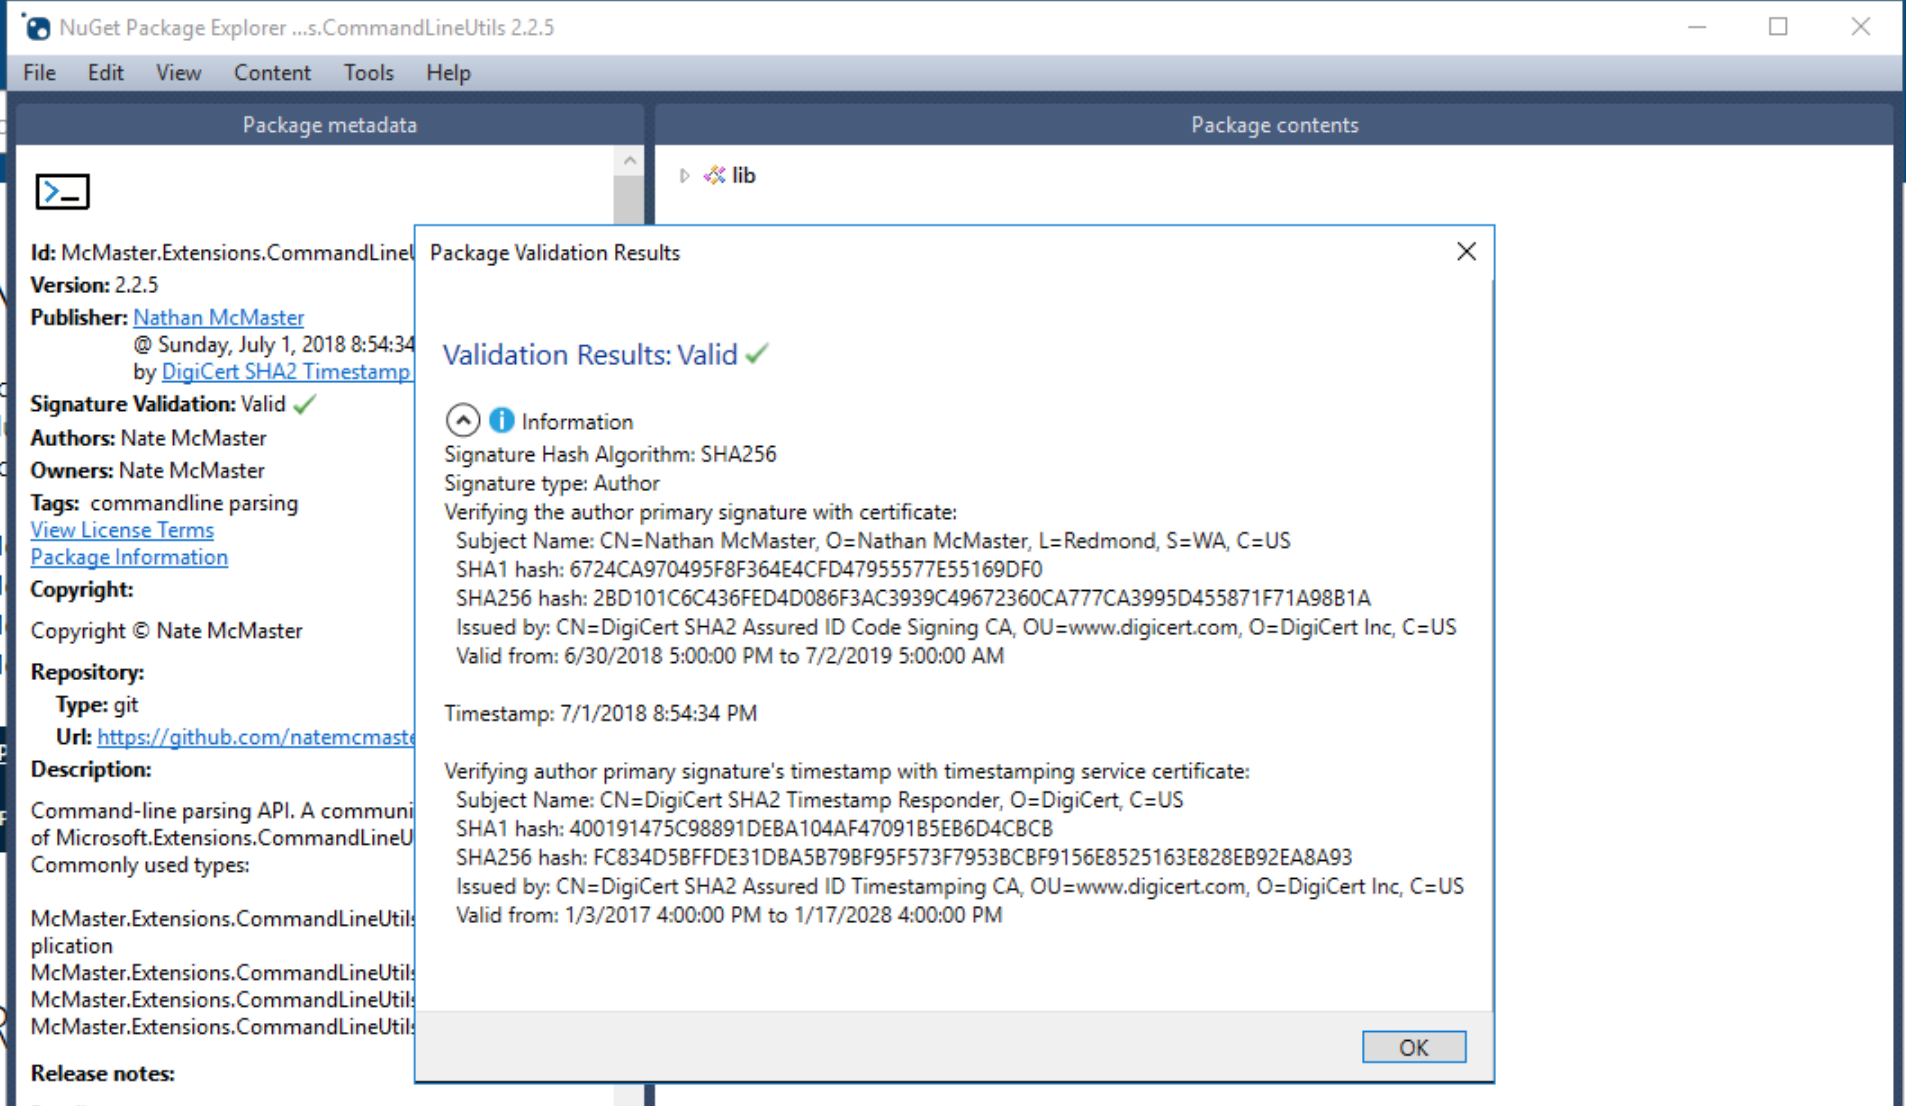
You can inspect package signatures with NuGet Package Explorer.
Altogether
In the end, I made this change to my project to enable code signing. https://github.com/natemcmaster/CommandLineUtils/commit/7d1a472462f86375226fb60904ce7e2116fcf1dd.
It’s only 122 lines of code, but it took a full weekend and several weeks of waiting on DigiCert to get this all worked out. Hopefully this guide helps you figure out how to set up code signing for your projects.
More reading
If you want to learn more about code signing, checkout the following resources.
- signtool.exe - The tool in the Windows SDK which can be used to sign using certificates installed locally on the machine instead of remotely in Azure Key Vault.
- Sign Service - If you want to set up a dedicated service to run code signing in the cloud,
- OpenOpcSignTool - Just like Azure Sign Tool, this provides a way to codesign Visual Studio Extensions (*.vsix files).